Courtesy Nikola Tesla
- The Rino 75x communicates over the FRS + GMRS frequency bands.
- FRS channels provide a range of up to 2 miles while conserving battery power.
- Using GMRS channels can boost that capability 10x with a range of up to 20 miles.
- Detailed channel, squelch and frequency data is available in Radio Information.
- View and access Radio information remotely with the Radio dashboard.
- Additional FRS + GMRS information available at GPSrChive > How To... > GMRS.
- See also: GPSrChive GMRS Discussion Forum.
Radio Buttons
- Call and Power button functions may be reconfigured as desired.
- Default Radio button functions:

Call • Press and Release to transmit an attention tone
• Press and Hold to transmit an Emergency Alert
•Transmits current position when location sharing is enabledPTT Push-To-Talk • Press and Hold to transmit audio
•Transmits current position when location sharing is enabled
Volume Up • Press and Release to open Volume and Squelch controls
• Press and Release again to increase radio volume
Volume Down • Press and Release to open Volume and Squelch controls
• Press and Release again to decrease radio volume
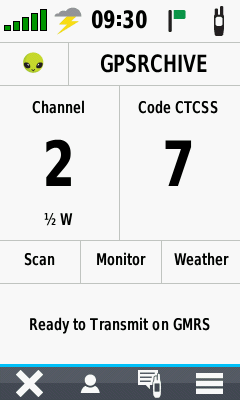
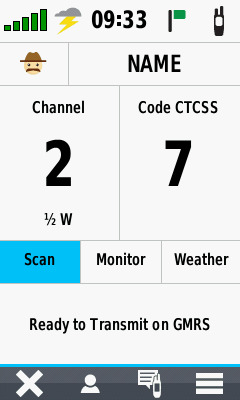
Radio Page Operation
- The Radio page is divided into multiple
operational panels:
|
|
Status | |||
|
|
Identification | |||
 |
Channel Selection | |||
|
|
Function | |||
 |
Activity | |||
|
|
Menu |
Status
- Status indicators include:

GPS signal strength 
NOAA Weather Alert enabled 
Radio muted 
Current time 
Location Sharing enabled 
Radio receiving data (Rx) 
Radio enabled 
Radio transmitting data (Tx)
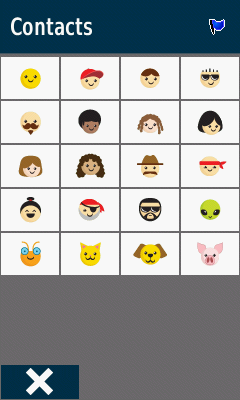
Identification
- Configure the user name and icon
other Rino users will see to identify you.
 |
 |
 |
 |
|||
|---|---|---|---|---|---|---|
| Select user icon | View available icons | Select desired icon | User icon is updated |
 |
 |
 |
 |
|||
|---|---|---|---|---|---|---|
| Select user name | Edit name as desired | Select
|
User name is updated |
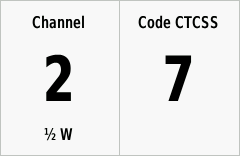
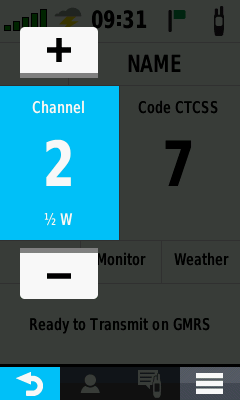
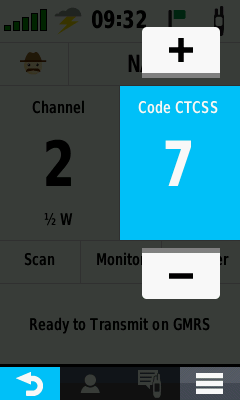
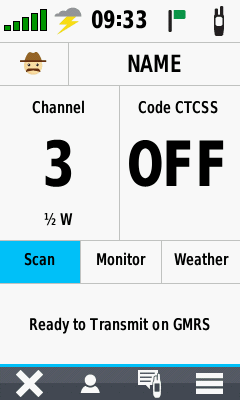
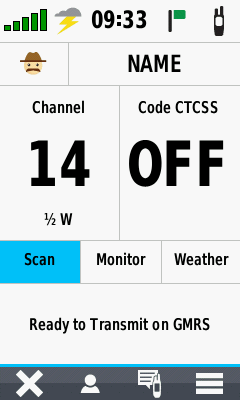
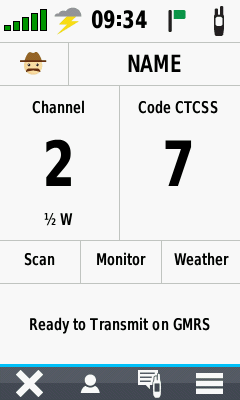
Channel Selection
- Displays the currently selected
radio channel and squelch code.
- Configure radio transmission power level and available channels in [Menu > Radio Setup].
 |
 |
 |
 |
|||
|---|---|---|---|---|---|---|
| Select channel number | Press
channel number |
Press
channel number |
Select
channel number or |
- Configure squelch tone mode in [Menu > Radio Setup].
 |
 |
 |
 |
|||
|---|---|---|---|---|---|---|
| Select squelch code | Press
squelch code |
Press
squelch code |
Select
squelch code or |
Function
- Enable and disable desired radio functions:
- Configure scanned channels in [Menu > Scanlist Setup].
 |
 |
 |
 |
|||
|---|---|---|---|---|---|---|
| Press Scan to begin scanning enabled channels |
Enabled channels are scanned for activity |
Press Scan at any time to stop scanning process |
Radio returns to channel selected before scan started |
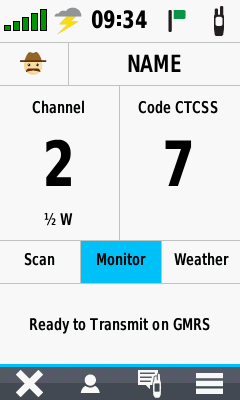
- Continuously monitor the selected channel without interruption.
 |
 |
 |
 |
|||
|---|---|---|---|---|---|---|
| Select desired channel | Press Monitor | Selected channel activity is played continuously |
Press Monitor again to disable channel monitoring |
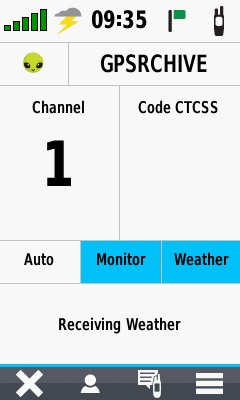
- Enable NOAA Weather Radio (US Only).
 |
 |
 |
 |
|||
|---|---|---|---|---|---|---|
| Press Weather to open weather radio |
Select desired channel | Select Monitor to play channel continuously |
Enable Auto to allow Rino to select the best channel |
Activity
- Detailed radio activity and information messages
are displayed here.
 |
|
 |
|
|||
|---|---|---|---|---|---|---|
 |
 |
 |
||||
Menu
- Make Radio page menu bar selections here.
|
|
|
|
|
|||
|---|---|---|---|---|---|---|
| Exit Radio Page | Open Radio Contacts | Open Radio Notes | Open Option Menu |
Option Menu
- Make Radio page option menu selections here.
 |
 |
 |
 |
|||
|---|---|---|---|---|---|---|
| Turn Radio Off | Turn Radio On | Enable Weather Alert | Disable Weather Alert | |||
 |
 |
 |
|
|||
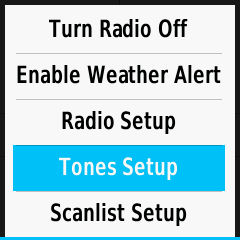
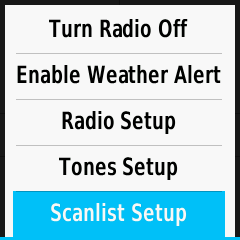
| Radio Setup | Tones Setup | Scanlist Setup |
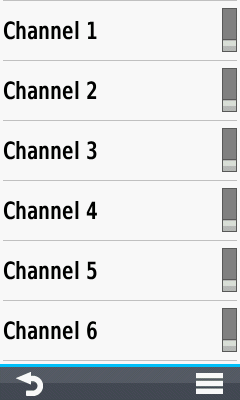
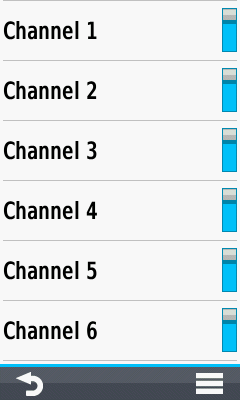
Scanlist Setup
- Configure channels and squelch codes as desired for
Scan Operation.
 |
 |
 |
 |
|||
|---|---|---|---|---|---|---|
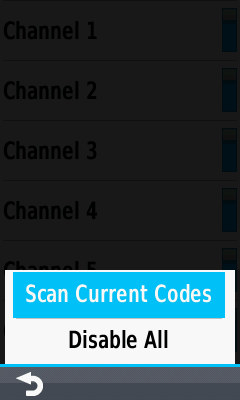
| View available channels | Enable/Disable individual channels as desired |
to disable all channels |
All channels disabled | |||
 |
 |
 |
 |
|||
|
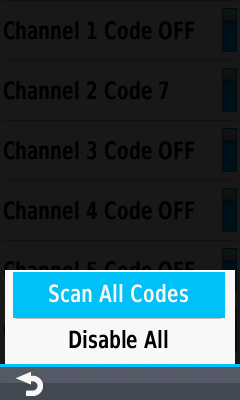
to enable all channels |
All channels enabled |
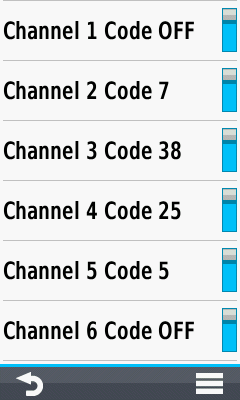
to scan channels using configured squelch codes |
All channels displayed with current squelch codes |
|||
 |
 |
 |
|
|||
|
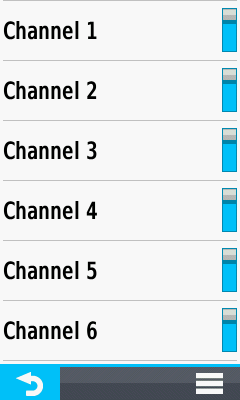
to scan channels ignoring configured squelch codes |
All channels displayed without squelch codes |
|
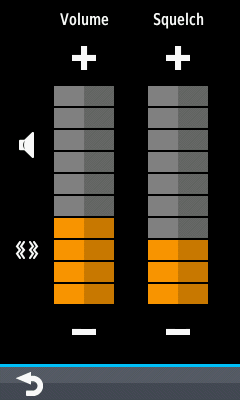
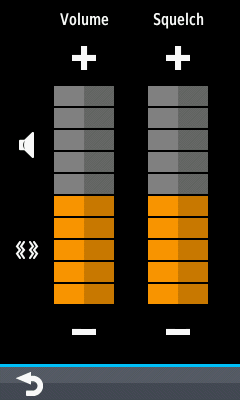
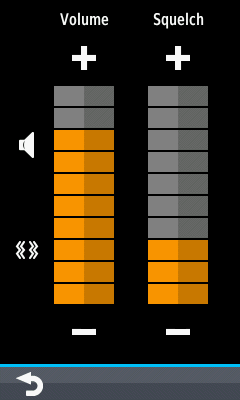
Volume and Squelch
- Press the Volume Up or Volume Down button on the side of the Rino to open this page.
- Adjust Radio Volume and Squelch as desired.
- Mute or Unmute all device audio.
- Enable or Disable
Vibration.
 |
 |
 |
 |
|||
|---|---|---|---|---|---|---|
|
|
|
|
|
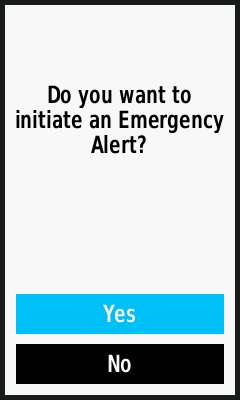
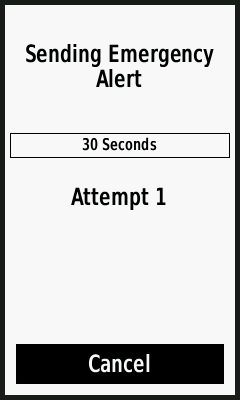
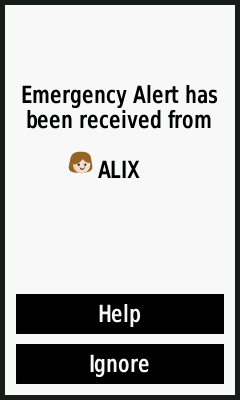
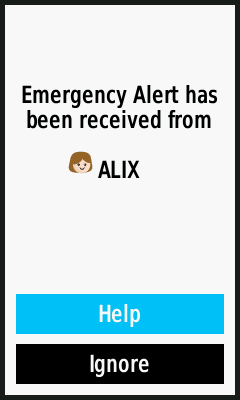
Emergency Alert
- Emergency Alerts are broadcast to all Rino radios using the same channel and squelch code.
- The Rino will continue transmitting the Emergency Alert until another Rino user responds or the alert is canceled.
- When responding to an Emergency Alert, a
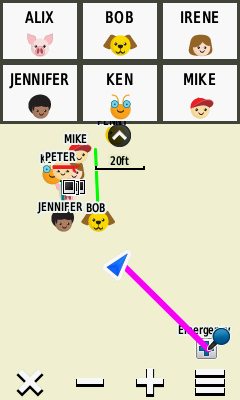
response is automatically sent and navigation started to the alert sender.
 |
 |
 |
 |
|||
|---|---|---|---|---|---|---|
|
|
Select [Yes] to proceed | Emergency Alert is transmitted |
Emergency Alert response notification |
 |
 |
 |
 |
|||
|---|---|---|---|---|---|---|
| Emergency Alert is displayed |
Select [Help] to Accept |
Automatic response is transmitted to sender |
Navigation to sender begins automatically |