Transferring paper or digital maps to your GPSMAP
is a relatively quick and simple process. Garmin Custom Maps are created using
Garmin map-drawing technology to georeference map images. Read the
Garmin Custom Maps press release.
Garmin Custom Maps offer practicality and convenience in everyday situations:
- For college students: Download campus maps from university websites and transfer the custom map to a Garmin handheld for easy navigating around campus.
- For hiking trips: Transfer a paper map of a nearby state park for added safety and security while on the trail.
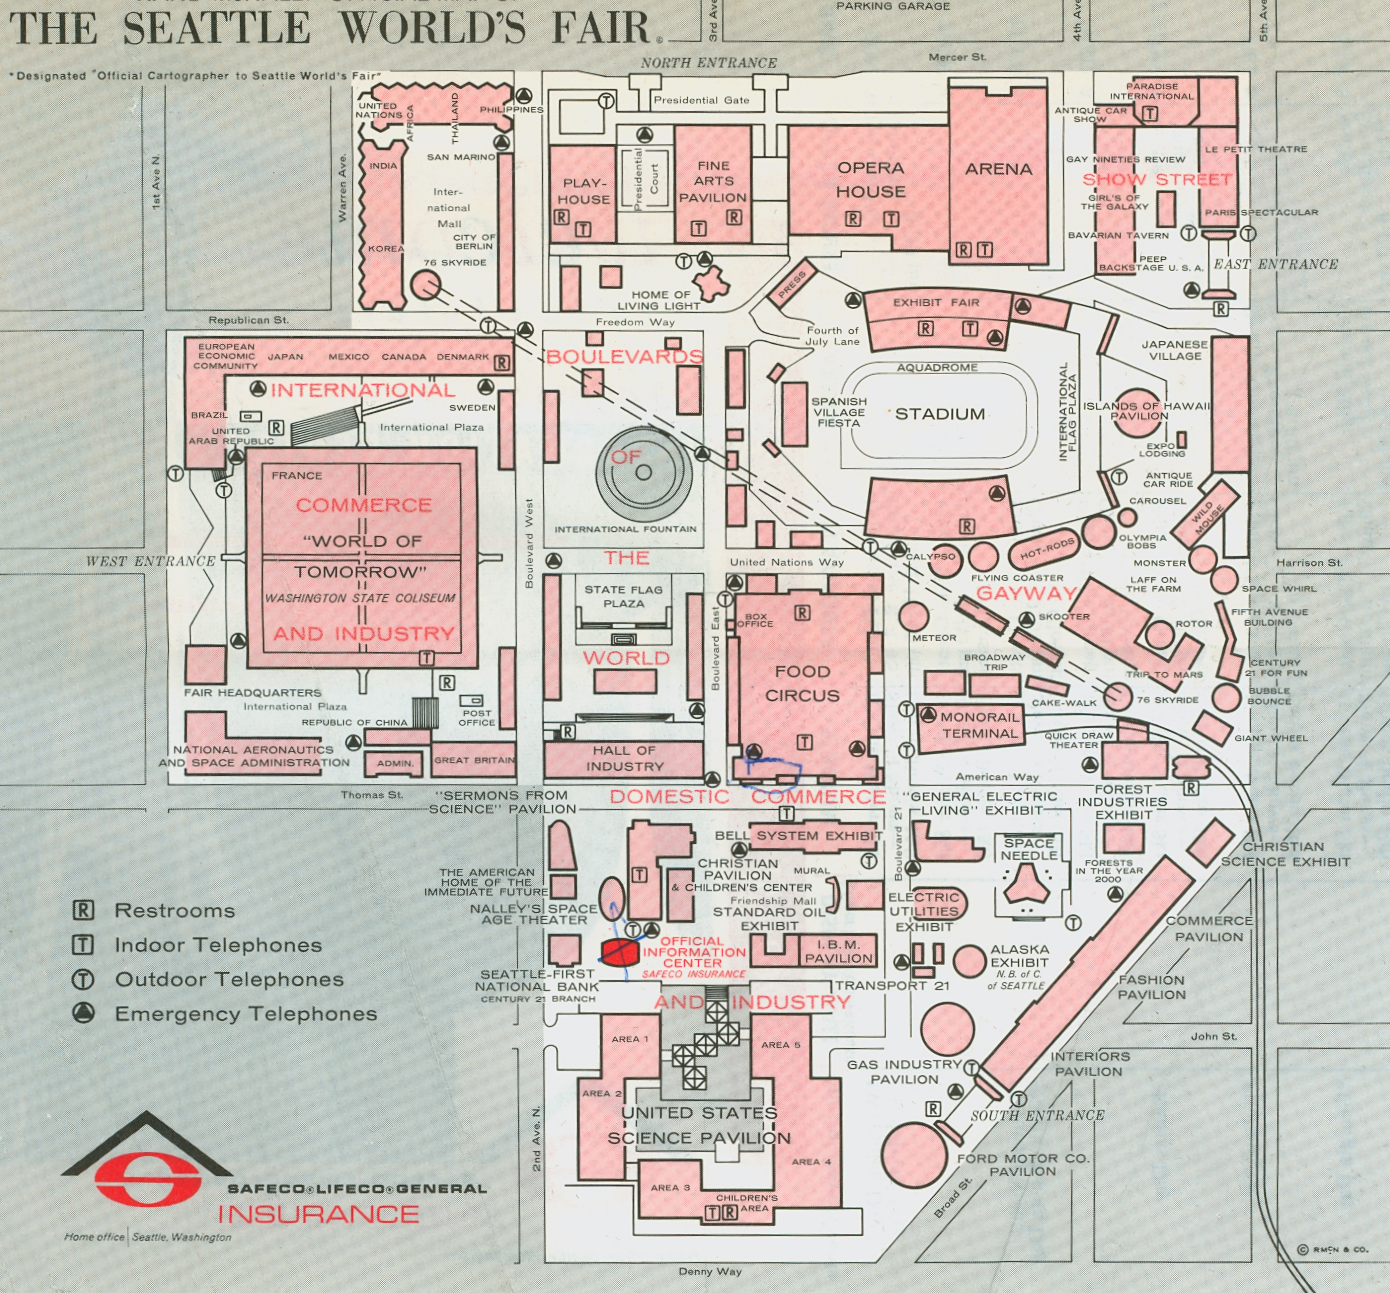
- For fun and education: Download a map of an area as it once appeared (such as the 1962 Seattle World's Fair) and explore that area as it once was and compare it to how it appears today.
Guidelines
- Some guidelines need to be followed to ensure Garmin Custom Maps will be displayed correctly on your device:
- More than one JPEG can preside in a KMZ file.
- The only KML file that will be processed is the doc.kml, inside the KMZ file.
- Jpegs files are the only supported image type (Single Layer Only - No Progressive JPEGs).
- KMZ files are read from the [Device]\Garmin\CustomMaps\ directory from both the GPSMAP internal memory and the µSD card.
- Images over 1 mega pixel (1024x1024 pixels, 512x2048 pixels, etc.) will be rendered at a reduced resolution on the unit. If this is causing a problem for your map, you can split the image and use multiple JPEGs inside of one KMZ file.
- Each JPEG should be less than 3MB.
- Most GPSMAP support up to 100 Custom Map JPEGs. (GPSMAP 64 will support 500)
- The size of the JPEG files will affect the draw speed on the GPSMAP.
- There is no limitation on KMZ file size so long as the previous limitations are observed.
- Waypoints, tracks, routes, geocaches, POIs, etc. will always draw on top of Custom Maps.
- Custom Maps with a higher DrawOrder are drawn on top of CustomMaps with a lower draw order.
- A Custom Map with a DrawOrder > 50 will draw on top of other maps.
- A Custom Map with a DrawOrder < 50 will draw on top of the land, water, and areas on other maps, but roads, topo lines, and depth contours will draw on top of the Custom Map.
Once you have selected a map you wish to transfer to your Garmin GPSMAP, follow these simple instructions and you'll be on your way in no time! For this example, I have selected this map of the 1962 Seattle World's Fair:
Lets get started!
Create a Custom Map
Save the Map in JPEG Format
- If your map is printed, scan the map at the appropriate resolution (dpi) for your device, and save the image as a JPEG.
- 170 dpi | eTrex 20x/30x
- 155 dpi | GPSMap 66 | Oregon | Colorado | Alpha 100 | Atemos 100
- 136 dpi | Montana, Monterra
- 130 dpi | eTrex 20/30
- 110 dpi | Dakota 10/20 | GPSMap 62/64/78 | eTrex Touch | Edge 810/800/510 | Rino 6xx | Astro 320/430 | Atemos 50 | Alpha 50
- If your map is electronic, such as a PDF, use your favorite image editing software (paint.net) to save it as a JPEG.
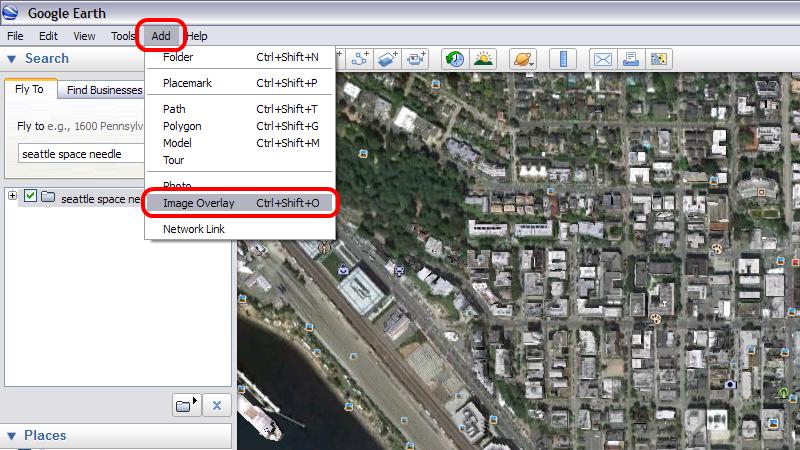
Create an Image Overlay
- Using Google™ Earth, locate the approximate area where your custom map is located.
-
From the top toolbar, select "Add" | "Image Overlay". (Ctrl+Shift+O)
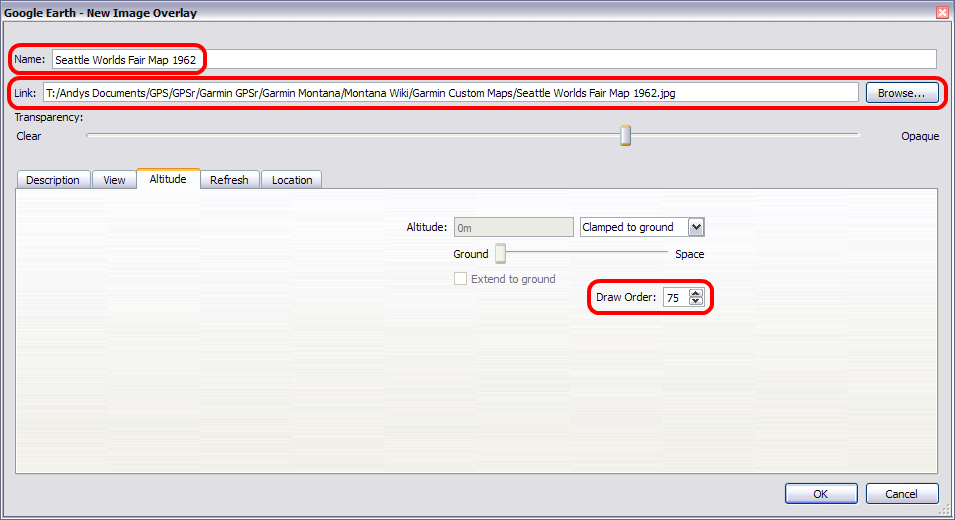
Link the JPEG
- Provide a name for your custom map.
- Set the Link field to the path of the source JPEG to georeference.
-
Find the tab with and set Draw Order. Draw Order is used to determine the order in which maps appear (draw) on your device. Maps with higher numbers are drawn on top of maps with lower numbers. Maps with a Draw Order of 50 or higher will generally draw over most Garmin maps.
Georeference the JPEG
- Adjust the transparency slider so the satellite imagery can be seen beneath the JPEG (Will not affect the final KMZ map).
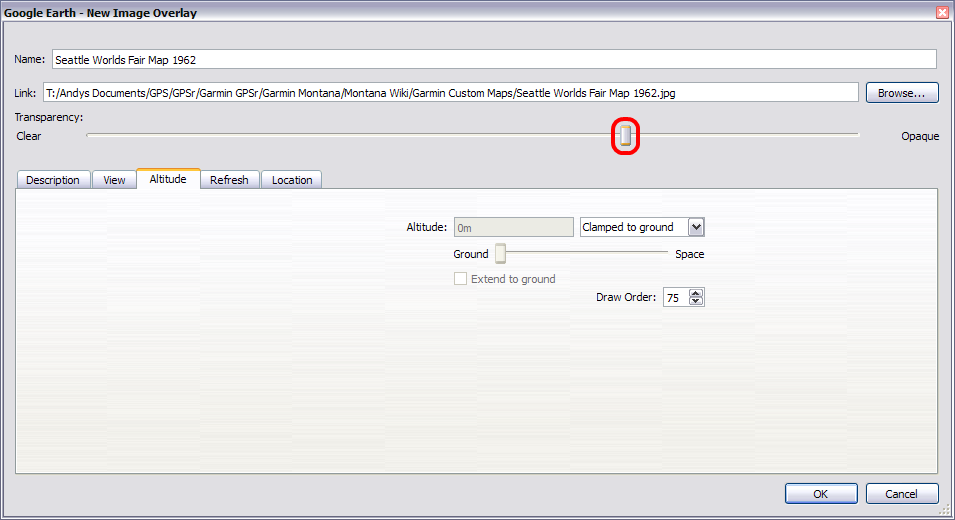
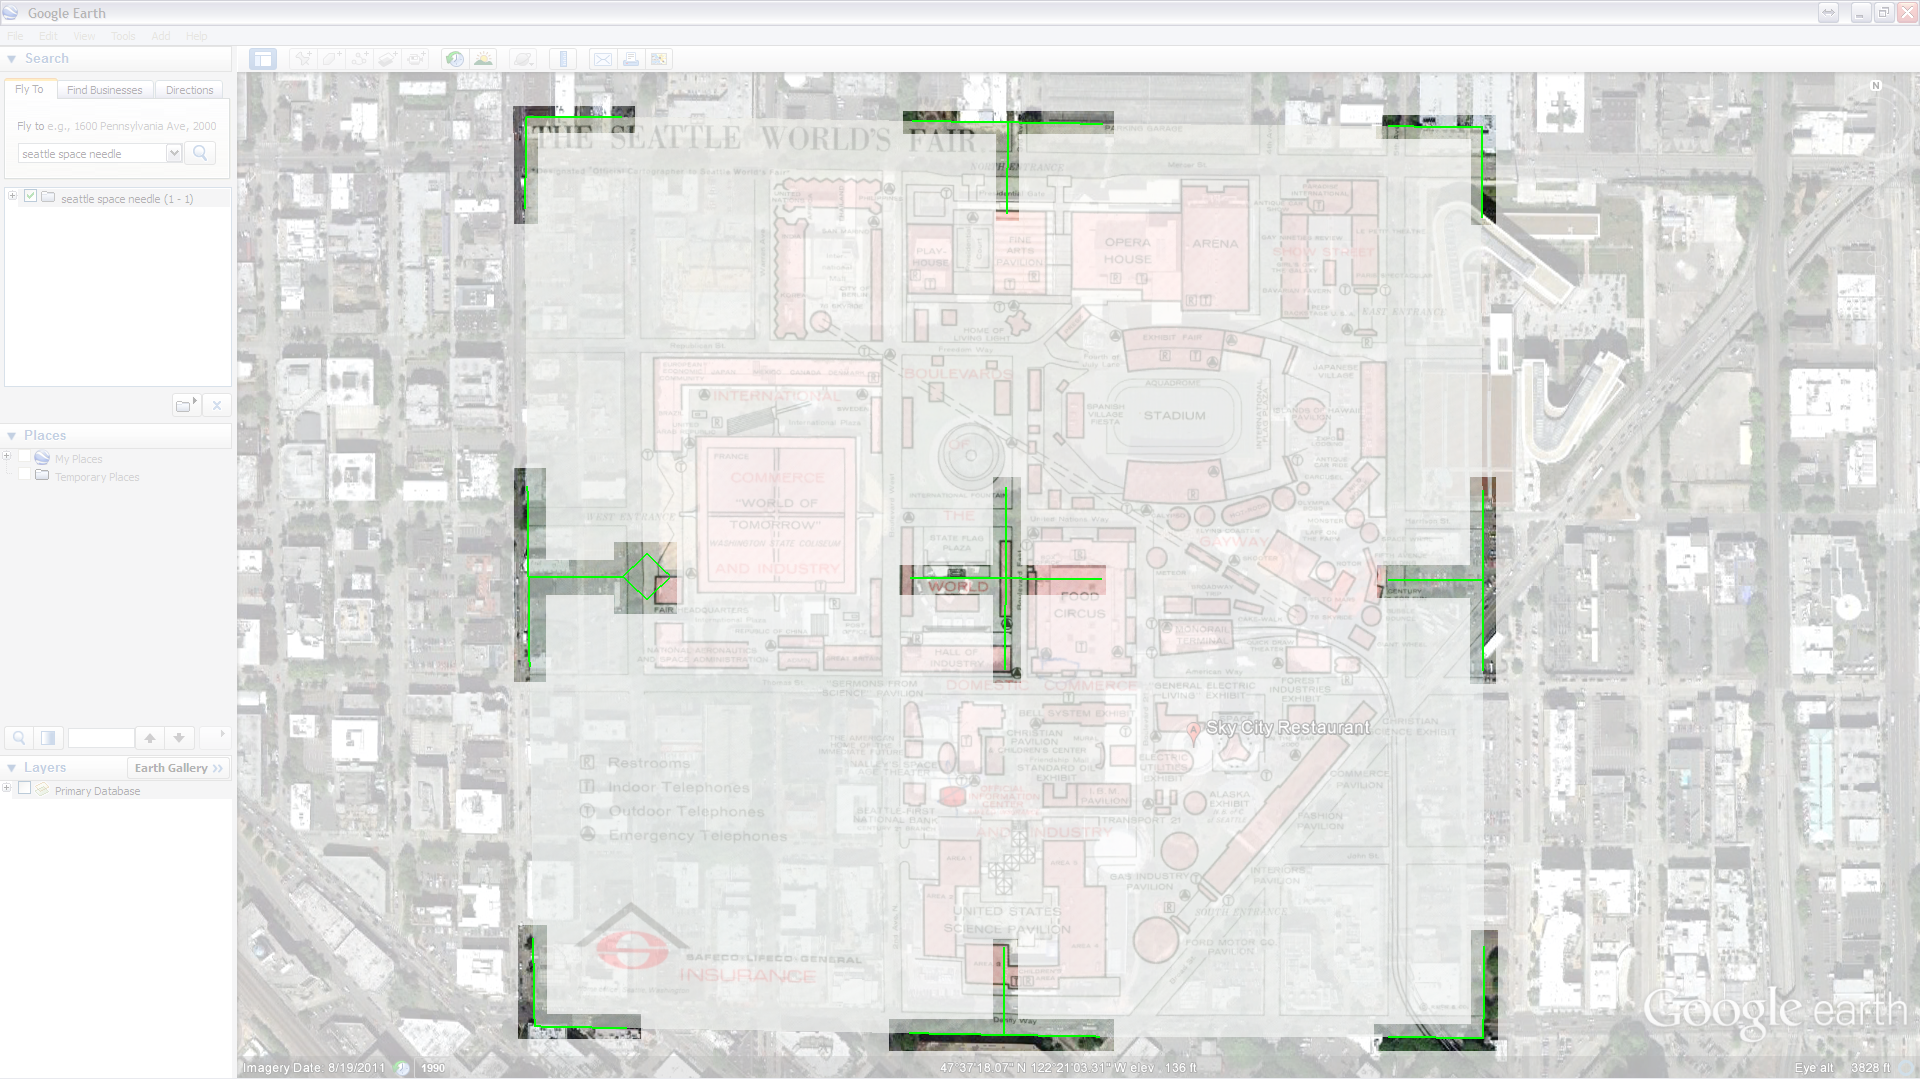
- Move the green marks to adjust the corners, edges, center, or rotation of the JPEG so it matches the satellite imagery beneath the image overlay.
-
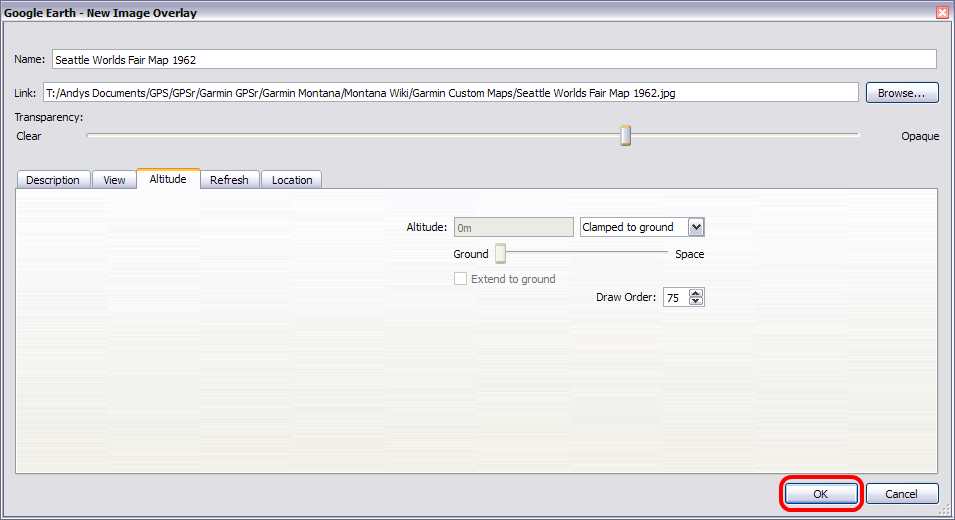
Continue making transparency adjustments as needed while georeferencing the JPEG to the satellite imagery.
- When you are satisfied with the JPEG alignment, select "OK".
Save to Computer
Save Your Custom Map to Your Computer
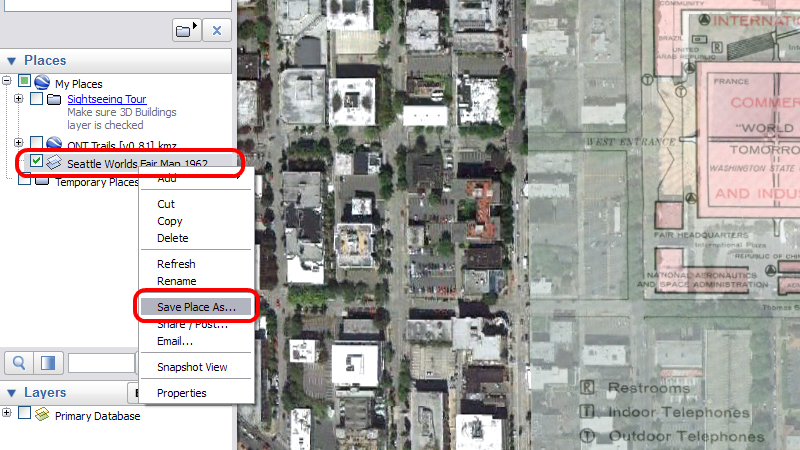
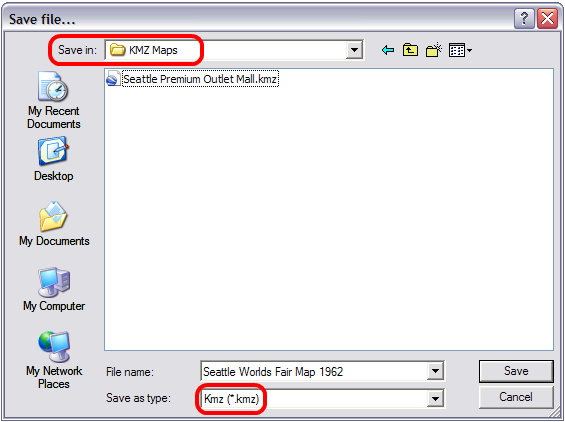
- Under the "Places" menu on the left side of the Google Earth window, right click on your custom map and select "Save Place As..."
- Select the directory you wish to save the Garmin Custom Map to ("KMZ Maps" in this example).
-
Save the file in KMZ format.
Save to GPSMAP
Save Your Custom Map to Your Device
- Connect your Garmin GPSMAP via USB and enable Mass Storage Mode.
-
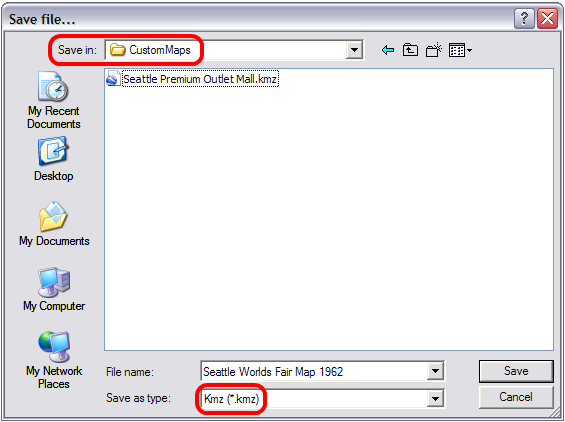
Under the "Places" menu on the left side of the Google Earth window, right click on your custom map and select "Save Place As..."
- Select the drive for your GPSMAP or µSD card.
- Save your custom map in the [Device]\Garmin\CustomMaps\ directory.
- Create a new "CustomMaps" directory if not already present.
-
Save the file in KMZ format.
Enable Custom Maps
- Disconnect and reboot your GPSMAP.
- Enable/Disable your Custom Maps in [Setup > Map > Map Information > Custom Maps].
- Garmin Custom Maps are enabled by default.
- Your new Custom Map will be displayed in the Map Application.