Creating Garmin Custom Maps in Five Easy Steps


7 October 2009 @ 8:00 AM  / Trail Tech /


Despite the growing breadth of maps designed specifically for outdoor handhelds, sometimes the best map for a specific activity is only available in printed form or as a PDF or JPG file.  Running the latest software releases for Garmin Colorado, Oregon, and Dakota devices, using paper maps with Garmin outdoor handhelds is easier than ever with Garmin Custom Maps.  This unique feature allows users to combine Garmin map drawing technology with georeferenced map images, effectively putting a paper map inside your Garmin GPS.  Creating a Garmin Custom Map for your Colorado, Oregon, or Dakota device is easy with the following steps. However, please be responsible and only create a Garmin Custom Map from a map that is in the public domain, you hold the copyright in, or you have permission to use from the copyright holder.


Step 1: Save the map in JPG format
Begin with the map you wish to use on your Garmin device.  If in printed form, scan the image at an appropriate resolution (Oregon & Colorado have a native solution of 155 dpi).  Garmin Custom Maps require the map be saved in JPG format. Since many maps are available in PDF, they may require conversion using GIMP or other suitable program.


Step 2: Create an Image Overlay
Using Google Earth to georeference your map, begin by locating the approximate area on Earth where your Garmin Custom Map will be located.  The closer the viewing window is to the location and coverage area of your JPG, the easier it will be to georeference. Once the location is set in Google Earth, use the menu to select “Add”, then select “Image Overlay”.


Step 3: Link the JPG
In the dialog box that follows, three important fields should be completed:
• Provide a meaningful Name. 
• Set the Link field to the path of the source JPG to georeference.
• On the Location tab, Draw Order can be adjusted if desired.  Draw order values less than 50 places the Garmin Custom Map below roads & trails, values 50 and greater places the Garmin Custom Map above most map features except points of interest & waypoints.


Step 4: Adjust the Boundaries
Before closing the New Image Overlay dialog box, you need to georeference the JPG.  The most common way to do this is adjust the green marks to adjust the corners (a), edges (b), center (c), or rotation (d) of the JPG so it matches the satellite imagery beneath.  It may be necessary to adjust the transparency (in the New Image Overlay dialog) to a level that allows adequate viewing of the JPG and imagery beneath.  Once you are satisfied with the alignment of the source material, select “OK” on the New Image Overlay dialog box.


Step 5: Send to Garmin
To send the newly created Garmin Custom Map to your Colorado, Oregon, or Dakota it should be saved to the device.  To do this, right click on your Garmin Custom Map in the “Places” section on the left-hand side.  From the popup menu, select “Save Place As”.  Use the following dialog box to save your Garmin Custom Map to your Garmin handheld device, placing the file in the /Garmin/CustomMaps/ directory.  Be sure to save the file in the KMZ format.  If preferred, the file can be saved to a microSD card, in a /Garmin/CustomMaps/ directory for use with Garmin handhelds.

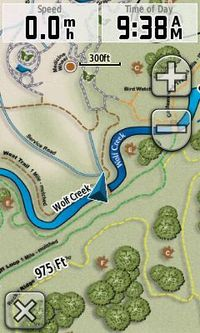
Once saved to the device, the Garmin Custom Map will appear as part of the map.  By default, Garmin Custom Maps are enabled on the device, but can be disabled under the Map Setup menu (select Map Information).

To discuss Garmin Custom Maps with others, please visit our Garmin Custom Maps developer forums.