- Have you ever unintentionally driven, biked, hiked or otherwise passed by a geocache because you were distracted and didn't realize it until it was too late?
- Creating a Custom POI file with Proximity Alerts for geocaches loaded on your GPSr can help prevent you from missing another geocache ever again!
- Remember - Geocaching.com requires geocaches to be placed a minimum of one tenth of a mile (520 feet) apart. Using an alert distance greater than this value in areas densely populated with geocaches may result in your GPSr constantly alerting you to surrounding geocaches!
- The audible alarm your Garmin GPSr uses to alert you to these Geocache Proximity Alerts can be changed as desired in [Setup > Tones > Proximity Alarms > Proximity Alarm].
Preparation
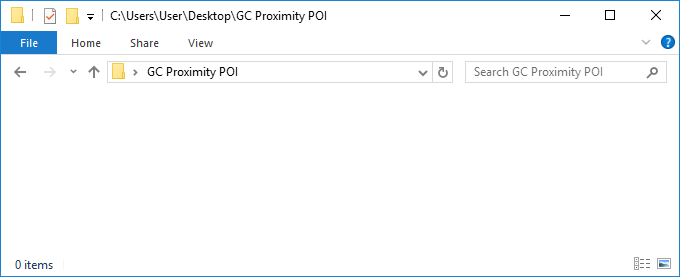
1. Create an empty 'GC Proximity POI' directory on your computer.
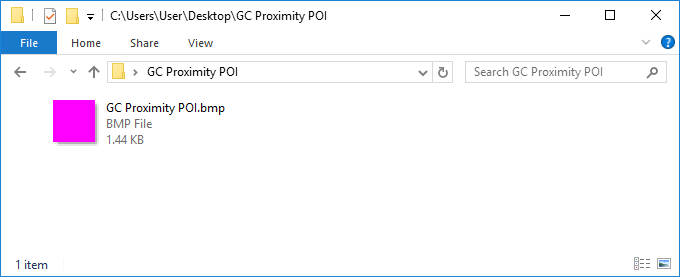
2. Place desired
custom POI symbol (*.bmp) in new directory.
- We prefer using a fully transparent POI symbol.
Create CSV
GSAK
1. Open GSAK database containing geocaches loaded to your GPSr.
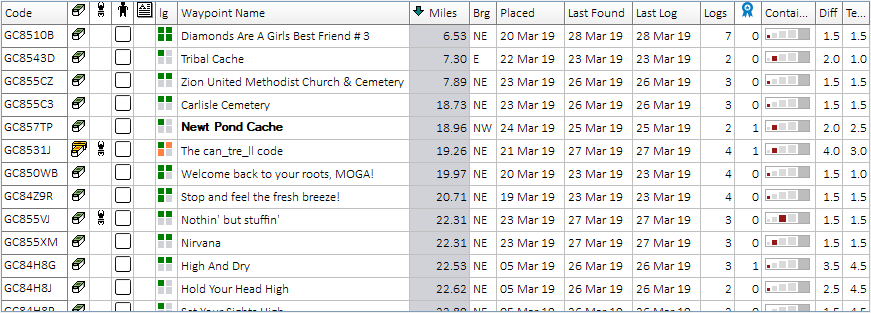
2. Create + Enable a 'View' in GSAK that displays only the data
specified here.
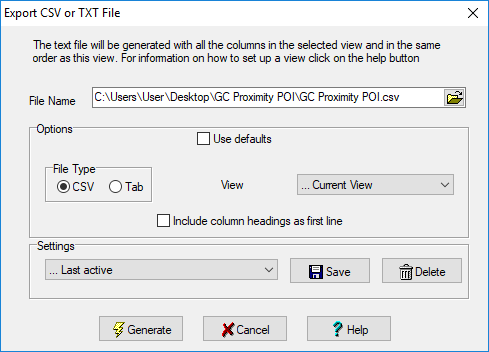
3. Select 'File' > 'Export' > 'CSV or TXT ...'
- File Name: Select directory created in Preparation Step 1 and
- Name *.csv file using identical filename as POI symbol in Preparation Step 2
- Options: Copy selections as displayed below
- Select 'Generate'
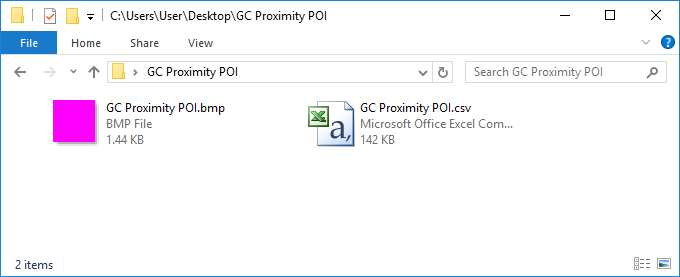
4. 'GC Proximity POI' directory should now contain one *.bmp file and one
*.csv file with identical names.
5. Continue to POI Loader Installation.
Excel
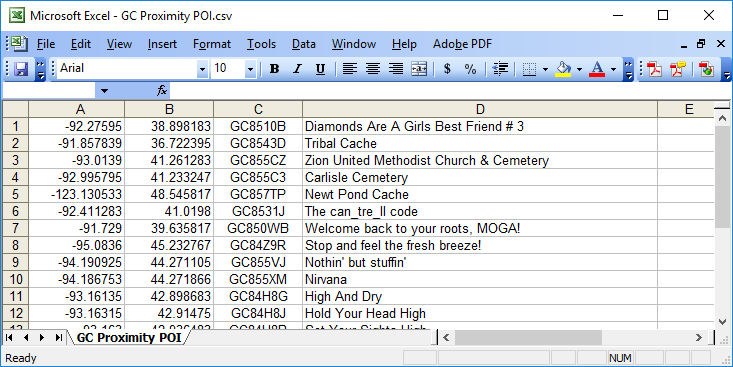
1. Create new Excel worksheet.
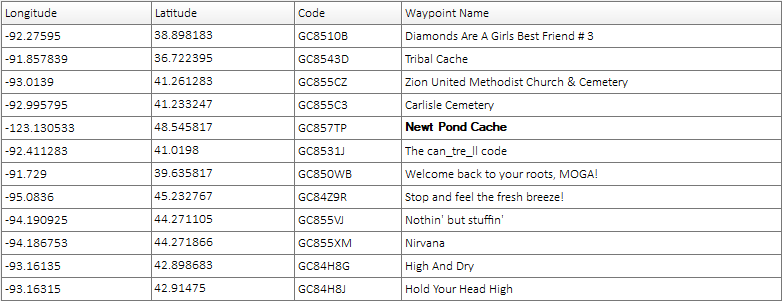
2. Manually enter required data into the first four columns for each
geocache as
specified here.
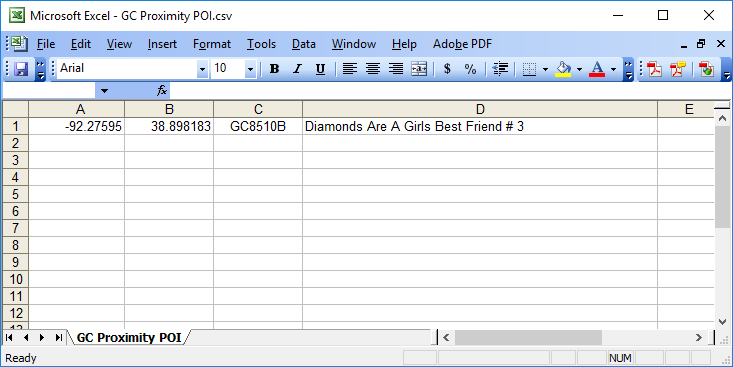
- Column A: Longitude (Decimal Degrees)
- Column B: Latitude (Decimal Degrees)
- Column C: Name (GC Code)
- Column D: Comment (Geocache Name)
3. Repeat process for each geocache as desired:
4. Save Excel worksheet in 'GC Proximity POI' directory as '*.csv' using
identical filename as POI symbol from Preparation Step 2:
5. Continue to POI Loader Installation.
Notepad
1. Open Notepad application.
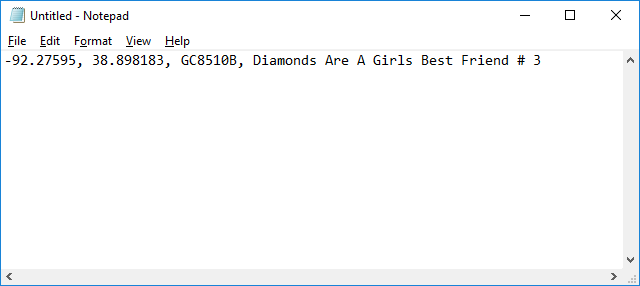
2. Manually enter required data for each geocache on one line using a
comma to separate the information as
specified here.
- Longitude (Decimal Degrees), Latitude (Decimal Degrees), Name (GC Code), Comment (Geocache Name)
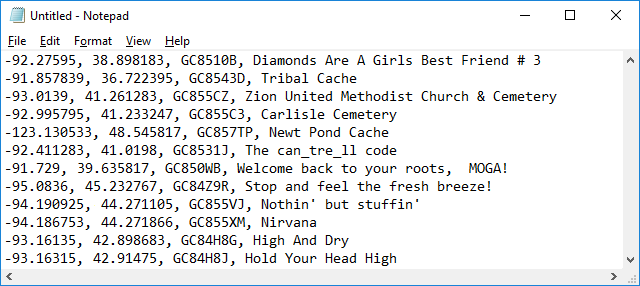
3. Repeat process on a new line for each additional geocache as desired:
4. Save file in 'GC Proximity POI' directory as 'All Files (*.*)' using
identical filename as POI symbol from Preparation Step 2:
- Add '.csv' to the end of the filename before saving.
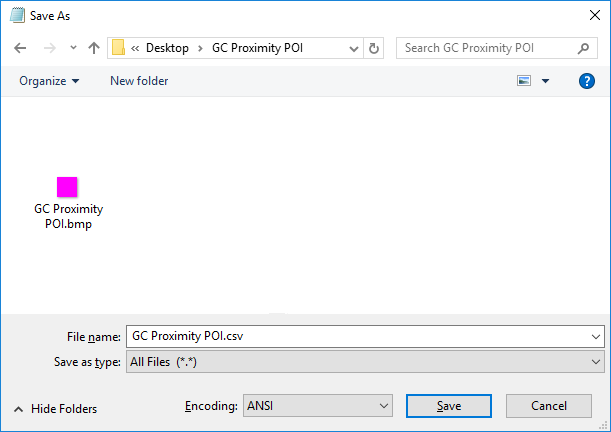
5. 'GC Proximity POI' directory should now contain one *.bmp file and one *.csv file with identical names.
6. Continue to POI Loader Installation.
POI Loader Installation
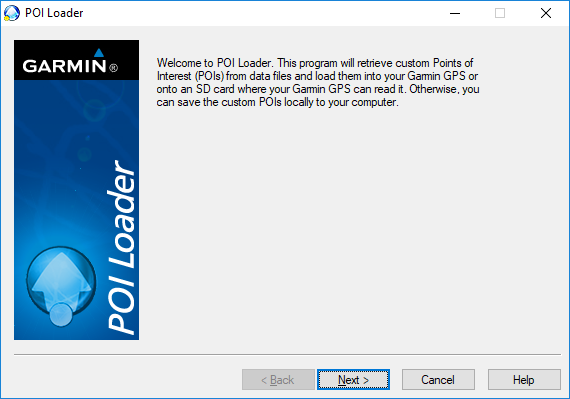
1. Connect desired Garmin GPSr via USB and open Garmin POI Loader.
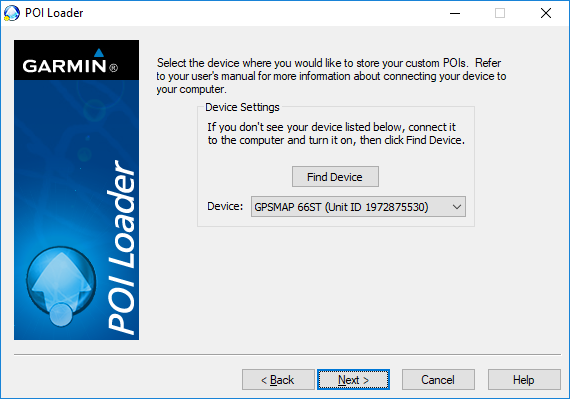
2. Select 'Garmin Device'.

3. Choose desired GPSr.
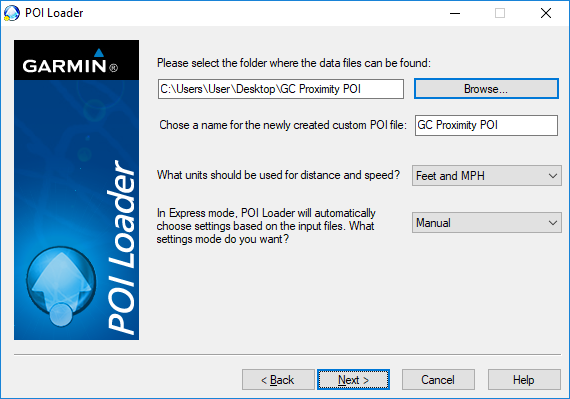
4. Select 'Install new custom POIs onto your device.'

5. 'Browse' to 'GC Proximity POI' directory and enter desired name for POI file on GPSr.
- Select 'Manual' for the last option
6. Make selections as show below and enter desired Alert Distance.

7. POI Loader compiles and transfers selected data to GPSr.
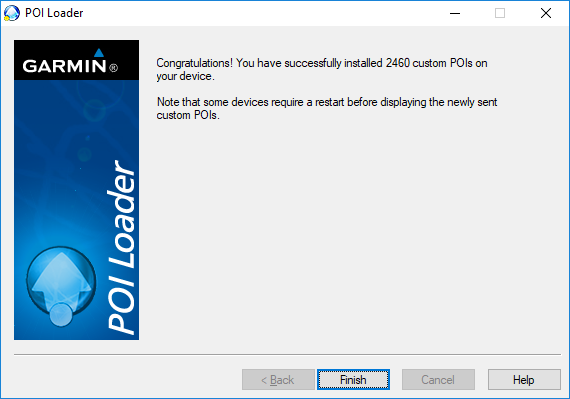
8. New *.gpi file visible in GPSr:\Garmin\POI
directory:
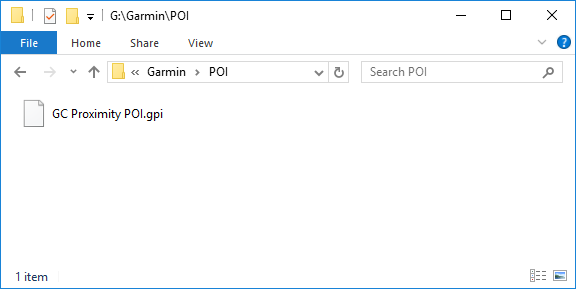
9. Disconnect and restart the GPSr.
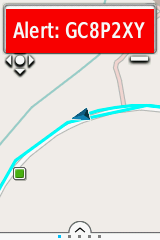
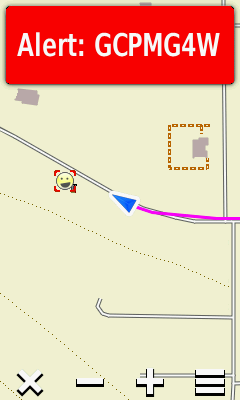
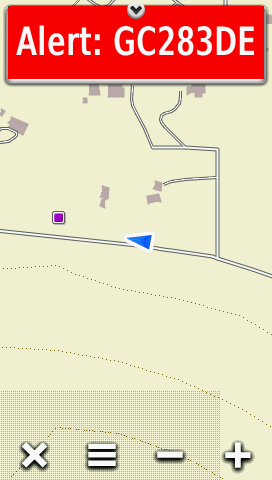
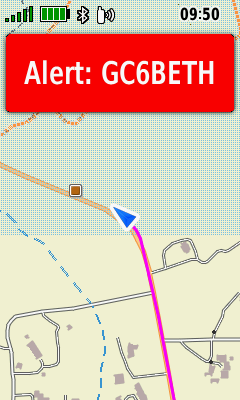
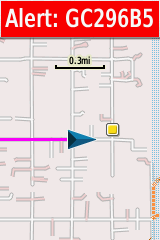
- Proximity Alerts will sound and display when approaching from the distance specified:
 |
 |
 |
 |
 |
| eTrex Touch | Oregon 7x0 | Montana 6x0 | GPSMAP 66 | GPSMAP 64 |